
Acrylic Bonding Techniques To Set Up Aquarium Windows [2025]


Over the last two decades of building aquariums and setting up aquarium windows,, I’ve seen many people focusing on thickness, clarity, or even cost. But a lot of them really don't know that what matters the most is the acrylic bonding.
I’ve seen tanks worth thousands of dollars fail because someone rushed a seam or used the wrong cement. And I’ve also seen beautifully built tanks last for decades, holding back tons of water, simply because the builder respected the craft of bonding.
So, in this guide, I’ve decided to teach the same set of principles and techniques I’ve relied on for over 30 years, refined through trial, error, and countless conversations with pros and hobbyists on forums like SaltwaterFish and Reef2Reef.
My goal is to help you know what it takes to set up acrylic aquarium windows that are strong, clear, and built to last.
Let’s begin.
TL;DR - Acrylic Bonding Techniques To Consider
- Capillary (solvent) bonding remains the strongest and cleanest method when edges are prepped correctly.
- Edge prep is non-negotiable. Perfectly flat and polished edges make or break the seam.
- Use the right cement for the job (Weld-On #4 for wicking, #16 for gap filling, industrial bonds for very large panels).
- Clamping and curing time matter just as much as the bonding itself. Don’t rush it.
- For large aquarium windows, it’s often worth consulting or hiring an experienced builder (such as Hammerhead Pools) to avoid costly mistakes.
Again, keep in mind, this guide is not for you to start your own DIY aquarium building journey. It’s only to help you know the details that the aquarium builders should put extra attention to. So yeah, always hire an expert for the job. DIY is not a very good idea for aquariums.
Now let’s get into the details.
The Core Techniques Of Acrylic Bonding For Aquarium Windows
There are a few key months to consider. Let’s walk through them and discuss a few lessons that matter most when setting up aquarium windows.
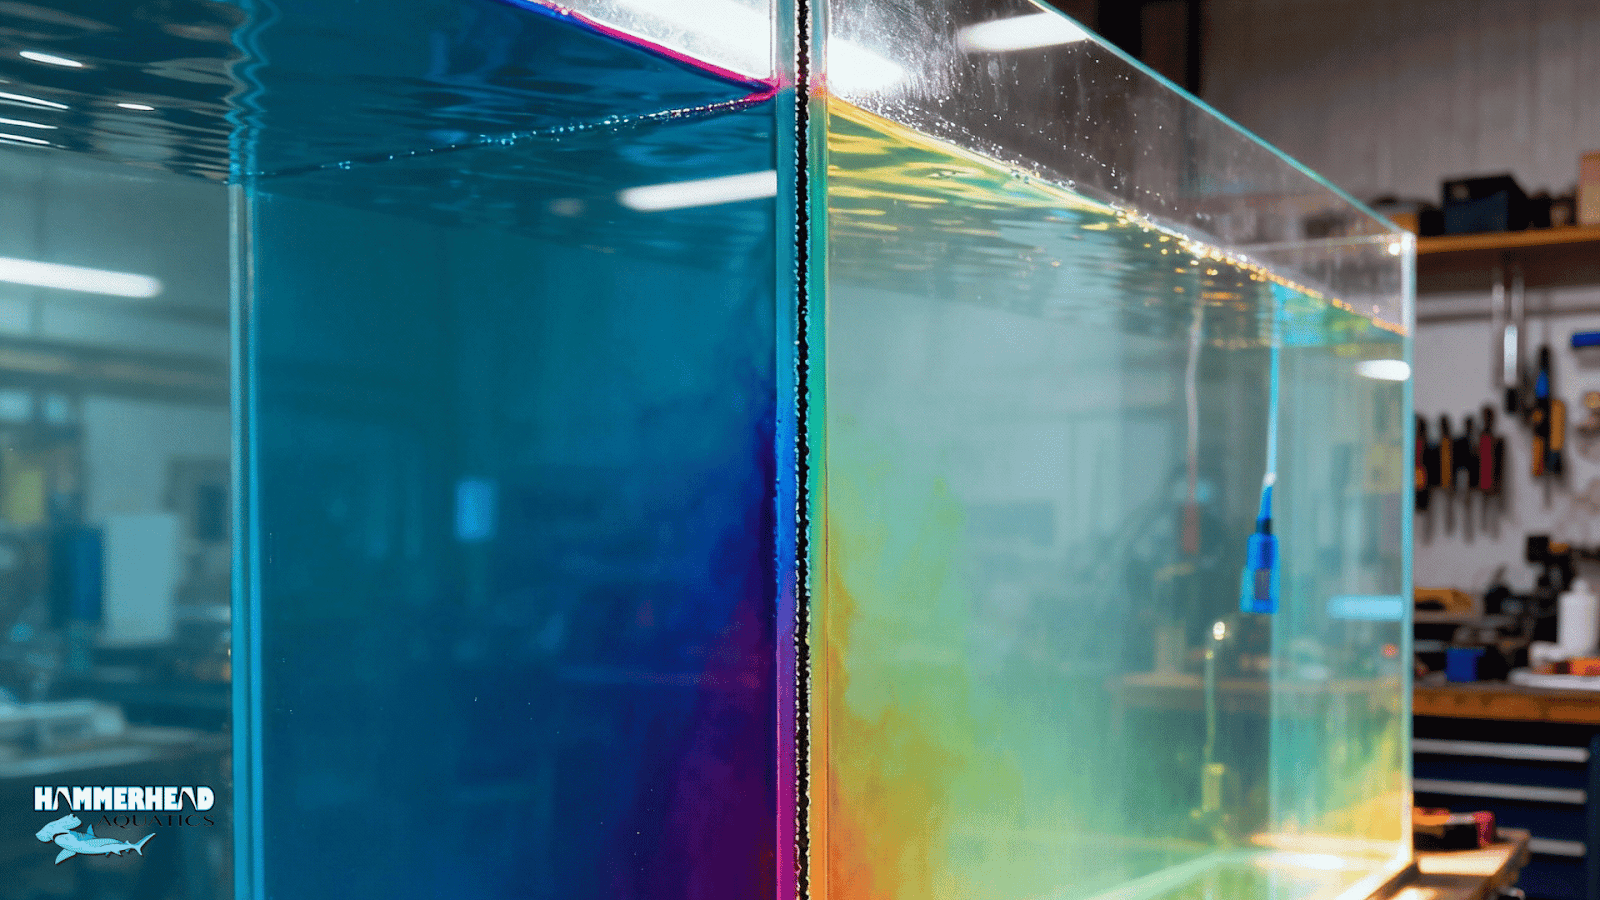
1. Capillary (Solvent) Bonding – The Gold Standard

The capillary method is where every builder starts, and for good reason. Instead of slapping on glue, you line up your acrylic panels with a tiny gap, then let a thin solvent wick its way into the seam. The solvent actually melts the acrylic surfaces, and when it evaporates, the two sheets harden into one solid piece.
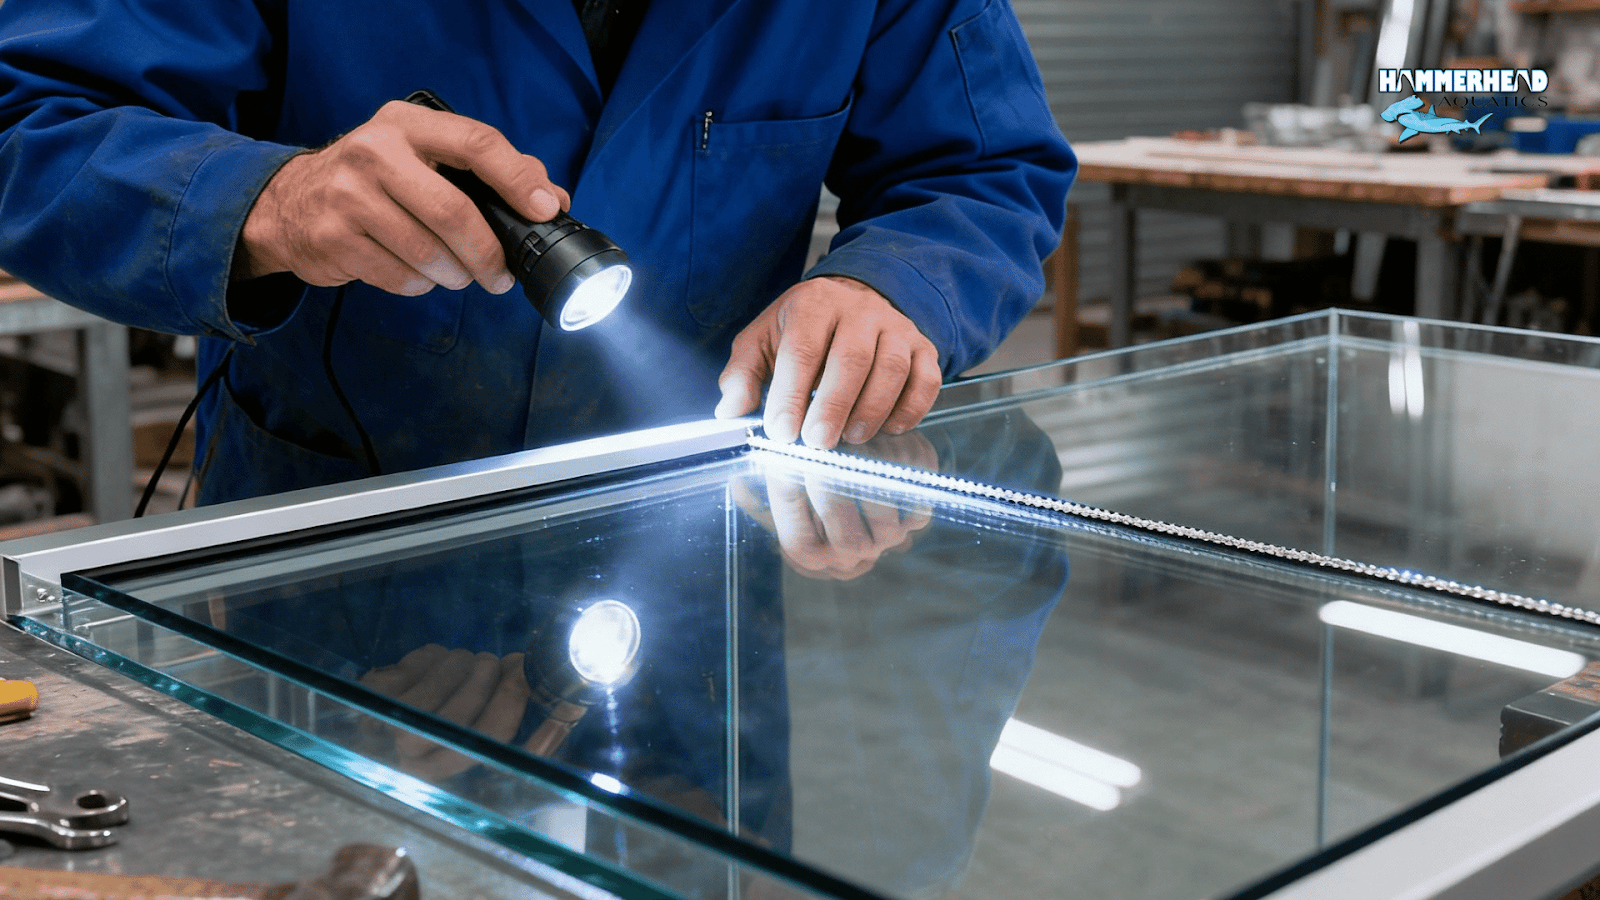
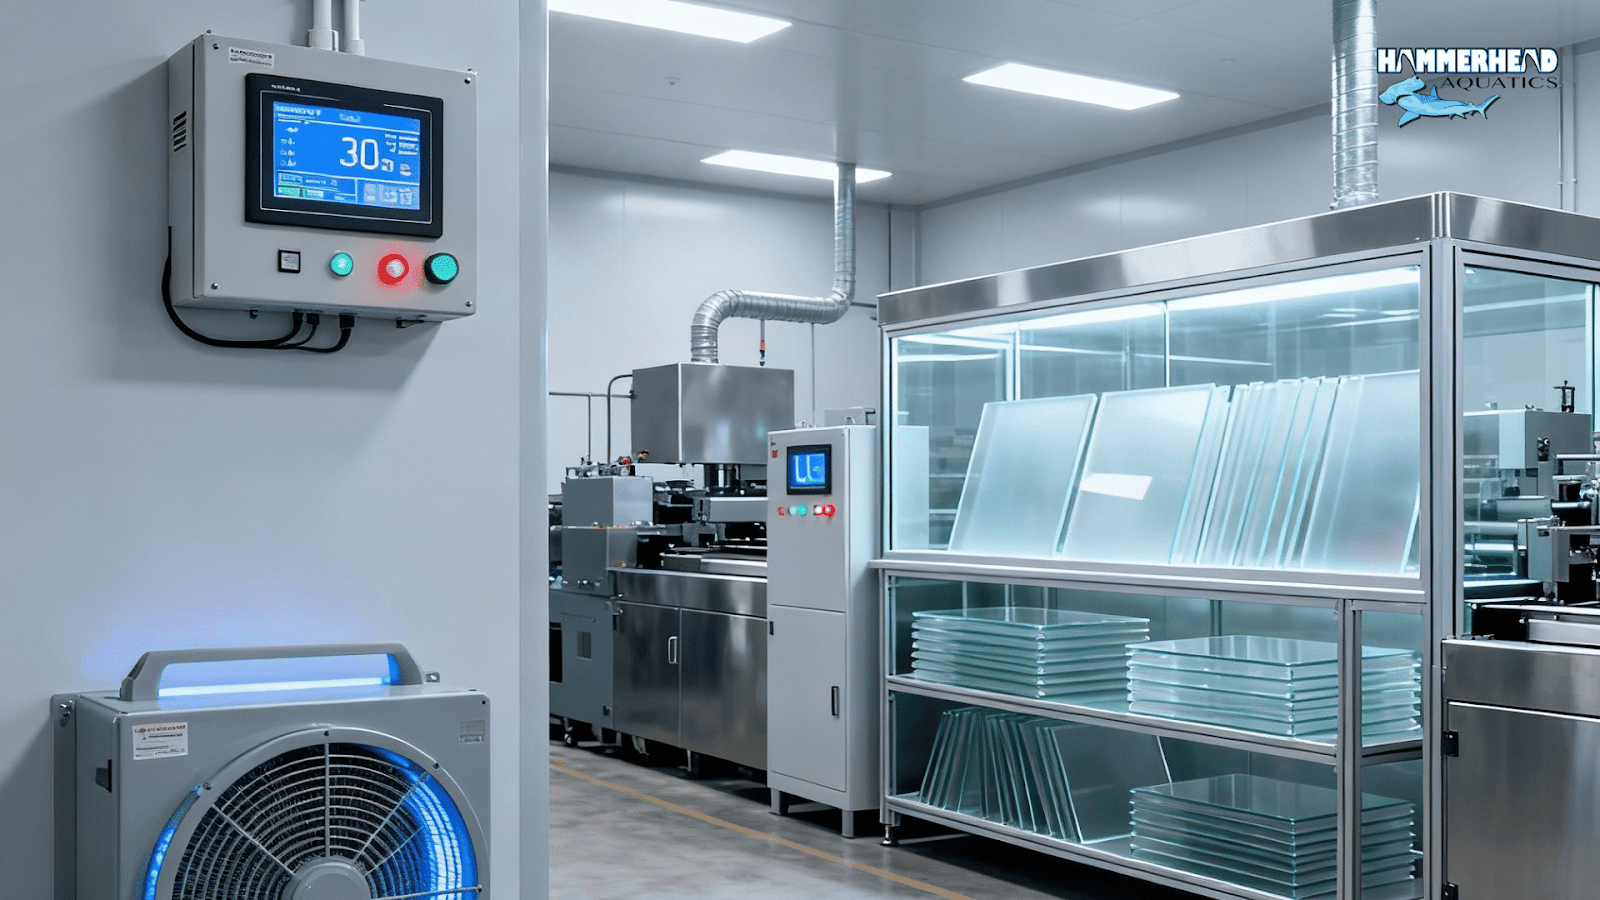
But here’s where most beginners mess up: edge prep. If your edges aren’t square, clean, and free of saw marks, the solvent won’t flow evenly, and you’ll end up with weak spots or bubbles. I once inspected a 600-gallon tank that looked fine at first fill, but three months later, microbubbles appeared along the seams. The culprit? The builder had skipped sanding the edges.
Pro tip: Always do a dry run. Clamp your panels together, shine a flashlight behind the joint, and check for light leaks. If you see even a pinhole of light, don’t bond yet, fix the edge first.
2. Using Thicker Cements For Imperfections
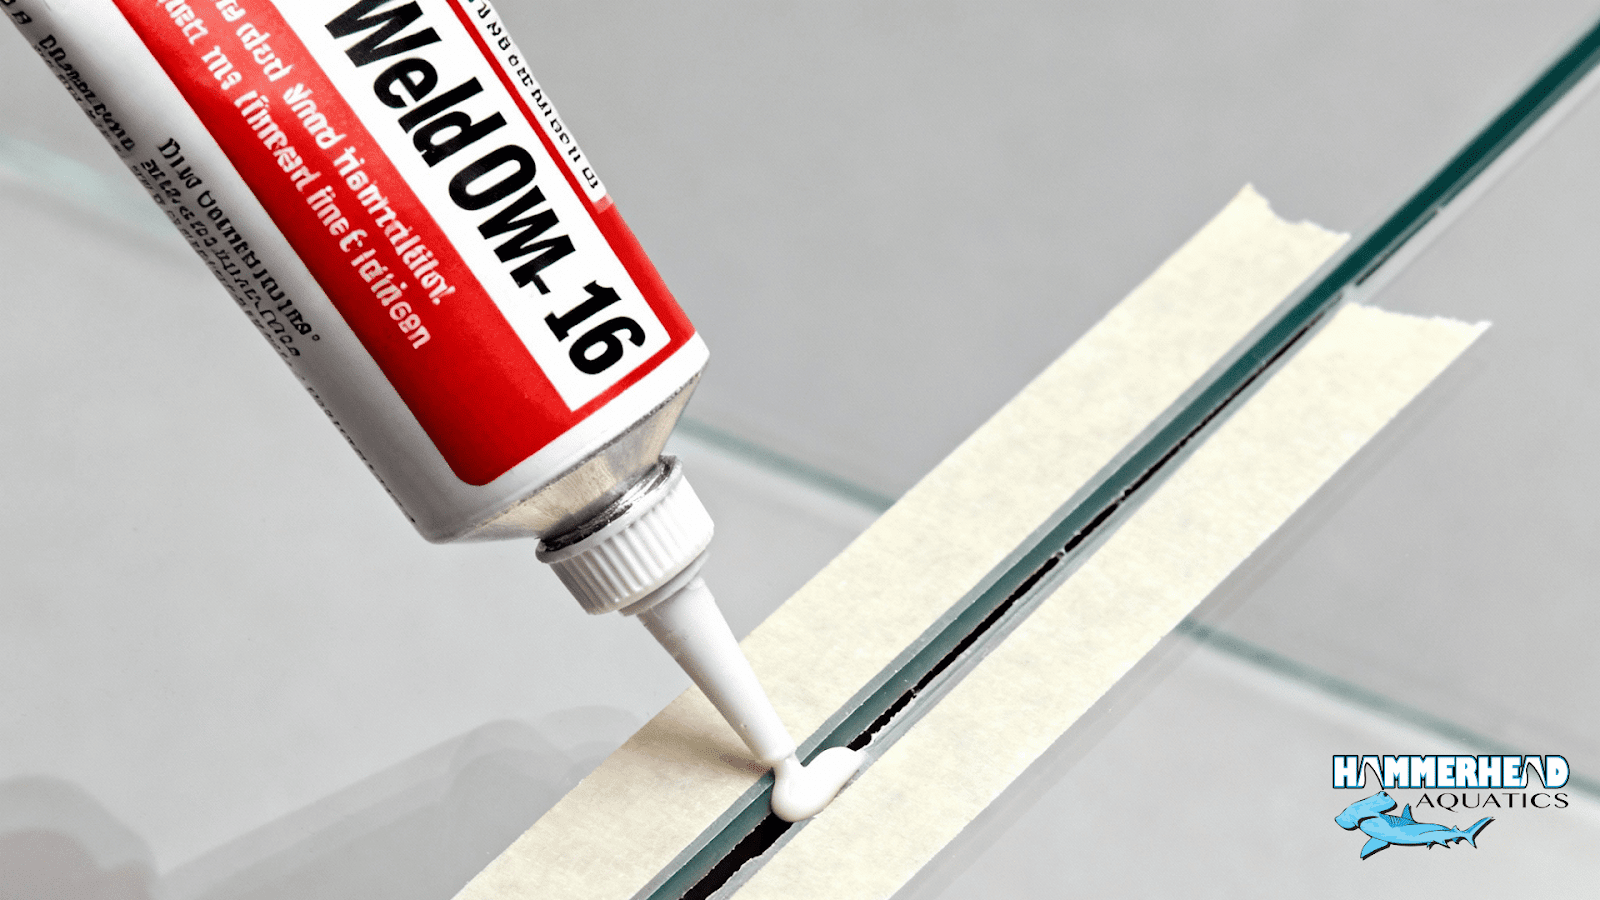
Not every edge will be perfect, especially on DIY builds. That’s when thicker cements like Weld-On #16 come into play. These are basically solvents mixed with dissolved acrylic, creating a syrupy adhesive that can fill small gaps.
I don’t recommend using thick cement as your main bonding method. Think of it as a patch kit. If your capillary seam leaves a small void or bubble, that’s when you reach for the thicker formula.
Where I use it most:
- Filling small voids in long seams.
- Reinforcing areas near corners where stress tends to collect.
Cosmetic touch-ups where clarity matters less than security.
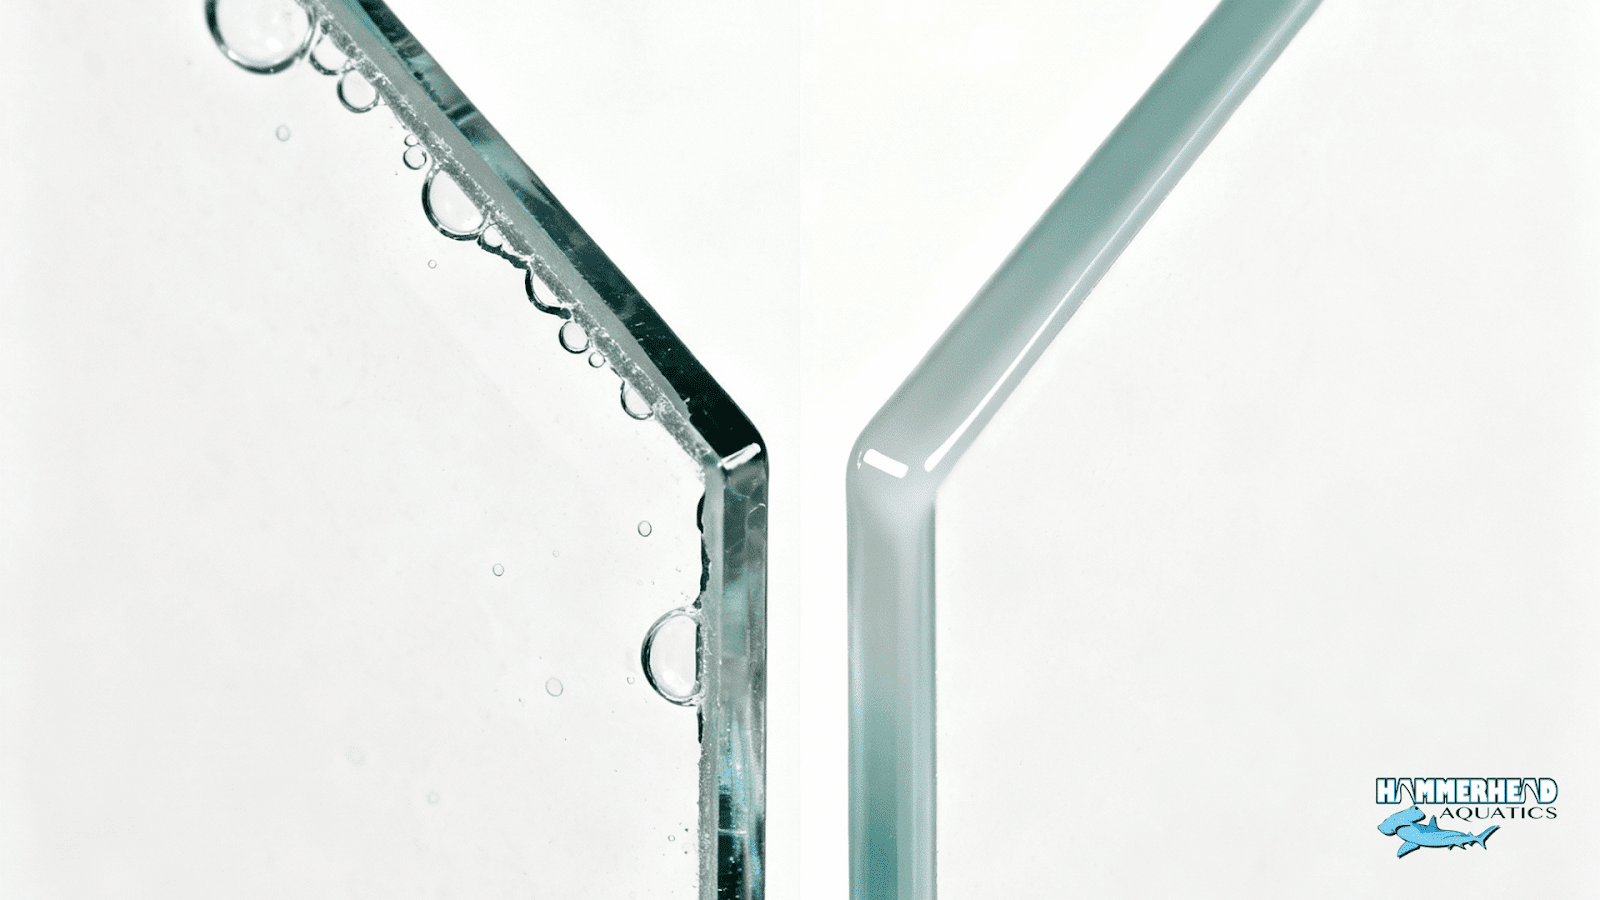
3. Choosing the Right Joint Type
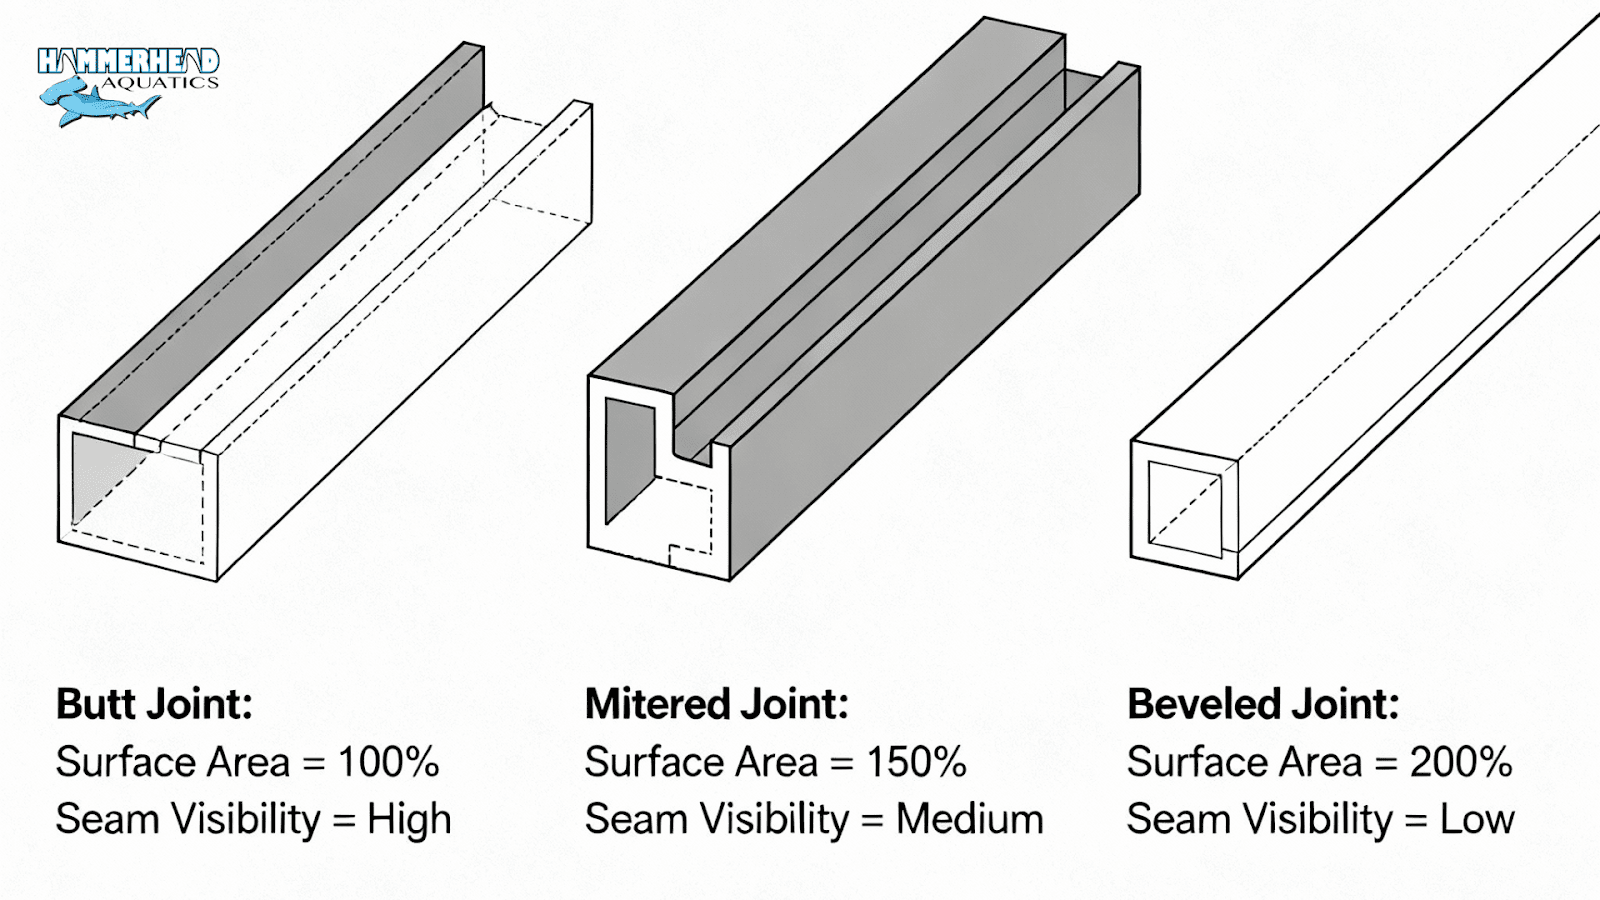
Over the years, I’ve experimented with different joint styles for aquarium windows:
- Butt joints
The simplest, but the seam is more visible. Works fine for smaller tanks. - Mitered joints
Harder to cut, but they hide seams better and increase bonding surface. I prefer these on large display windows where aesthetics matter. - Beveled edges
A slight bevel can help solvent flow and reduce stress at the edge, though it takes practice to cut cleanly.
When I build windows over a meter wide, I almost always go with mitered joints. The extra effort up front pays off when you see how clean the viewing panel looks.
4. Clamping, Pins, and Patience
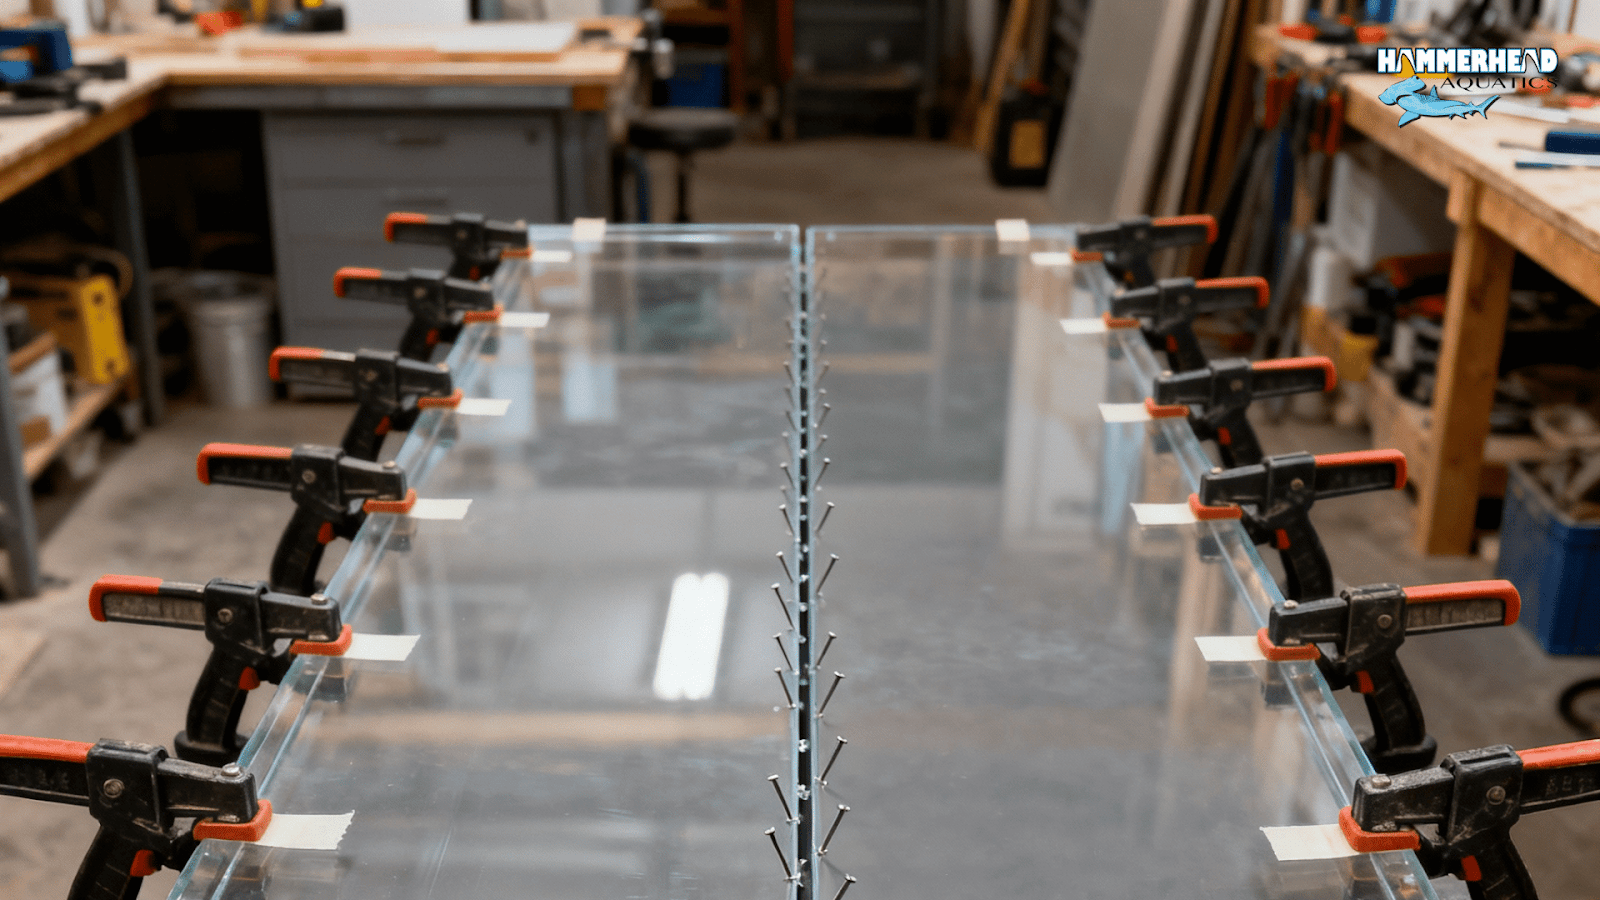
Bonding acrylic isn’t just about the solvent, it’s about holding the panels perfectly still while the solvent does its work.
Here’s my routine:
- Use small pins (I often use guitar strings) to hold a micro-gap between panels.
- Apply the solvent so it wicks in evenly.
- Slowly slide the pins out as the solvent fills the seam.
- Clamp or tape the panels to ensure zero movement.
Then comes the hardest part: waiting. I never rush curing. For small windows, I’ll leave seams clamped for at least 24 hours. For large, thick acrylic panels? Sometimes 72 hours before I even think of moving them. Water pressure doesn’t forgive impatience.
5. Environmental Factors Few Talk About
One mistake I see too often is ignoring the room conditions. Solvent bonding is extremely sensitive to the environment.
- Temperature
- Too hot, and your solvent flashes off before it bonds. Too cold, and curing slows to a crawl. - Dust
- One tiny speck in your seam will haunt you every time you look through that window. - UV
- Over years, UV light can weaken or yellow joints if you don’t use stabilized acrylic and adhesives.
When I built a public aquarium panel a couple of years ago, we controlled humidity and temperature in the workshop for weeks. That panel still looks brand new today.
6. Testing Before You Trust It
Never assume your seam is perfect. Always run a test. I always water-test my tanks or panels before fish ever go near them. Start by filling gradually, watching seams under pressure. Shine lights along the joints and look for bubbles.
For very large windows, I sometimes do a dye test — adding a safe dye to water and checking seams with bright light. If there’s even the smallest leak, I’d rather find it then after the tank is stocked with livestock.
7. Long-Term Maintenance
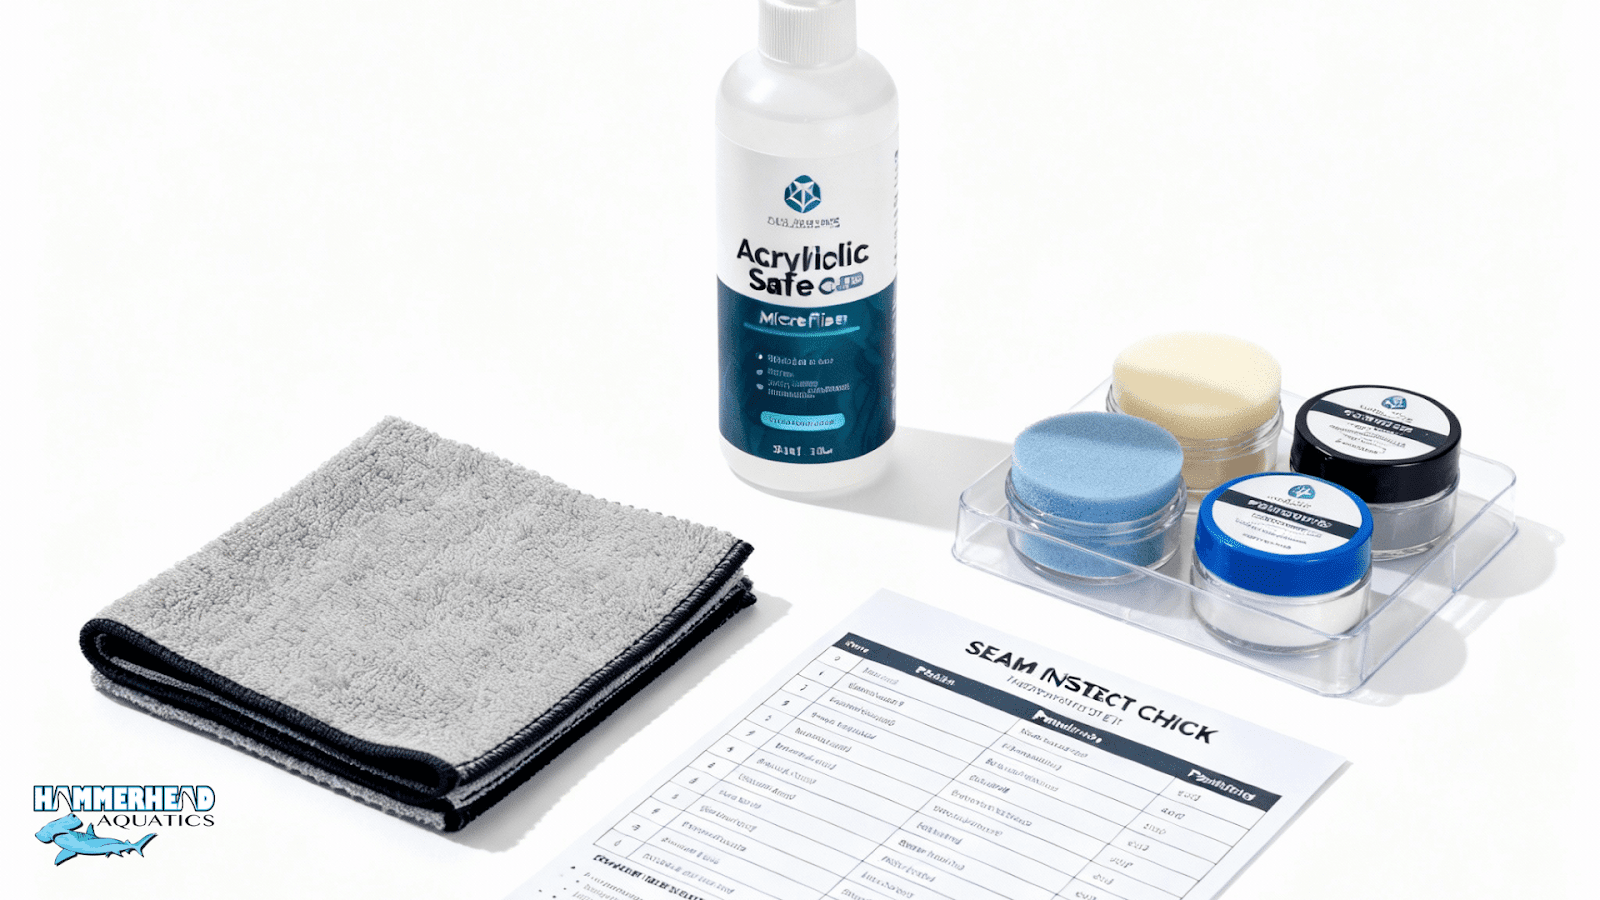
Even the best-built aquarium windows need care. Over the years, I’ve learned to give clients a short checklist:
- Use acrylic-safe cleaners — never glass cleaners, which can cause crazing.
- Inspect seams annually, especially if your tank is in direct sunlight.
- Avoid sudden changes in water chemistry, which can stress acrylic over time.
- Polish scratches before they grow.
Acrylic is strong, but it’s not indestructible. Treat it right, and your windows will outlast most other parts of the tank.
8. Modern Innovations in 2025
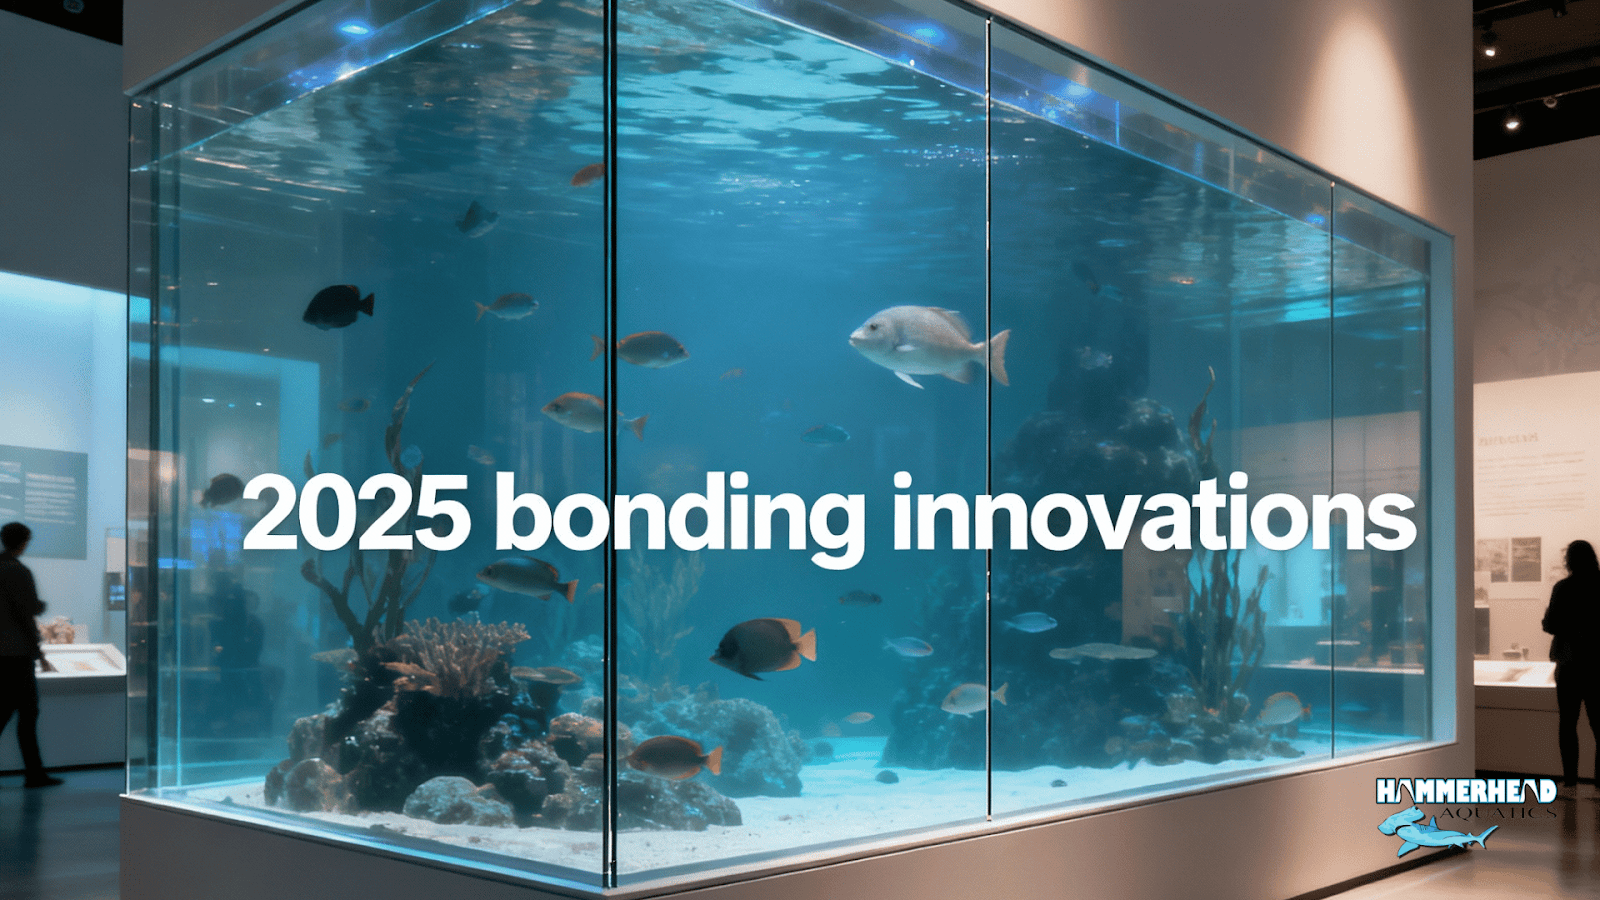
Today’s large aquarium builders have taken bonding to a new level. Companies like Reynolds Polymer use “invisible bonding” techniques that make seams practically disappear, even on massive panels. While that tech is out of reach for most hobbyists, the principle remains the same: precise edges, clean bonds, and proper curing.
For home or mid-scale projects, newer low-odor, UV-resistant cements are making it easier to build tanks that last longer without yellowing. It’s an exciting time to be in this field.
Final Thoughts
If there’s one thing I want you to take away, it’s this: acrylic bonding is the foundation of your aquarium window. Everything else relies on how well those seams are made. Put in the time to prep, bond, and cure properly, and you’ll have aquariums that look stunning and stay watertight for decades.
Expert Aquarium Window Design & Installation
If you’re planning to set up custom aquarium windows and want them done right the first time, my team at Hammerhead Pools can help. We’ve designed and bonded acrylic panels for everything from home displays to public exhibits. Get in touch for a free quote.
Or, you may drop a comment below if you have questions about what you learned today. I’ll be happy to answer.
FAQs
1. How strong is solvent bonding compared to the acrylic itself?
In most cases, a properly done solvent bond is nearly as strong as the sheet. I’ve seen panels where the acrylic cracked elsewhere, but the seam held.
2. How do I avoid bubbles in the seam?
Bubbles usually mean edges weren’t flat or you rushed the solvent. Take more time on edge prep, and always use pins to keep the gap even.
3. Can I bond acrylic to glass for a hybrid build?
Yes, but it’s tricky. Glass and acrylic expand differently, so you need flexible adhesives like high-grade silicone. I don’t recommend it for large panels.
4. What’s the biggest mistake beginners make?
Impatience. They unclamp too soon or start filling the tank before the seam has cured. Give it the time it needs.
5. How long should I wait before adding water to a newly bonded tank?
For small tanks, 48 hours is usually safe. For large aquarium windows, I recommend 5–7 days before stress testing.
For flawless, long-lasting aquarium windows, never underestimate the importance of expert acrylic bonding. Whether for home tanks or large public exhibits, trust experienced builders like the team at Hammerhead Pools to handle edge prep, precise solvent application, and controlled curing. This not only ensures a watertight bond but preserves the clarity and aesthetic beauty of your display for decades. Always prioritize bonding quality over speed or cost—doing so protects your investment and aquatic life alike. Reach out for professional guidance or a free quote to build aquarium windows that stand the test of time.


